Quickstart
Your first working button: from an empty prim to a click that does something in-world. About ten minutes, no scripting.
Before you start
Read the Important Recommendations. The first one, always build with the object on the ground, avoids the most common problem.
What you need
- The 1Click Maker folder in your inventory (from the Marketplace).
- A place where you can rez objects.
- Two scripts from that folder:
*BUILDand*FUNCTIONS.
Part 1: the HUD in Second Life
Rez a cube on the ground. This will be your HUD. Name it, for example,
My First HUD.Rez a second cube, make it smaller, and name it
button_hello. Move it in front of the first one.Link them: select the button first, then Shift-click the big cube (so the big cube is the root), and press Ctrl+L.
Open the Content tab of the linked object (Edit → Content) and drag
*BUILDand*FUNCTIONSfrom your inventory into it.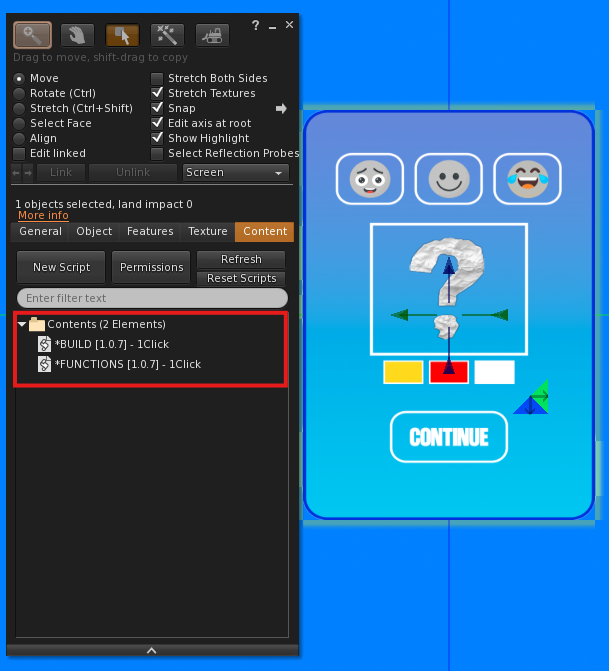
Both scripts inside the Content tab of the HUD. Read the local chat. The HUD says
Wait..., then prints a link. That link is your creation panel. Click it.
The link is personal
It opens your project without a password. Keep it to yourself. If you lose it, hold your mouse button on the HUD for one second to get it back (Reopen a Project).
Part 2: the panel
Scan the buttons. In the left column, click the green Scan button. The panel asks the HUD for its linked prims;
button_helloappears in the list.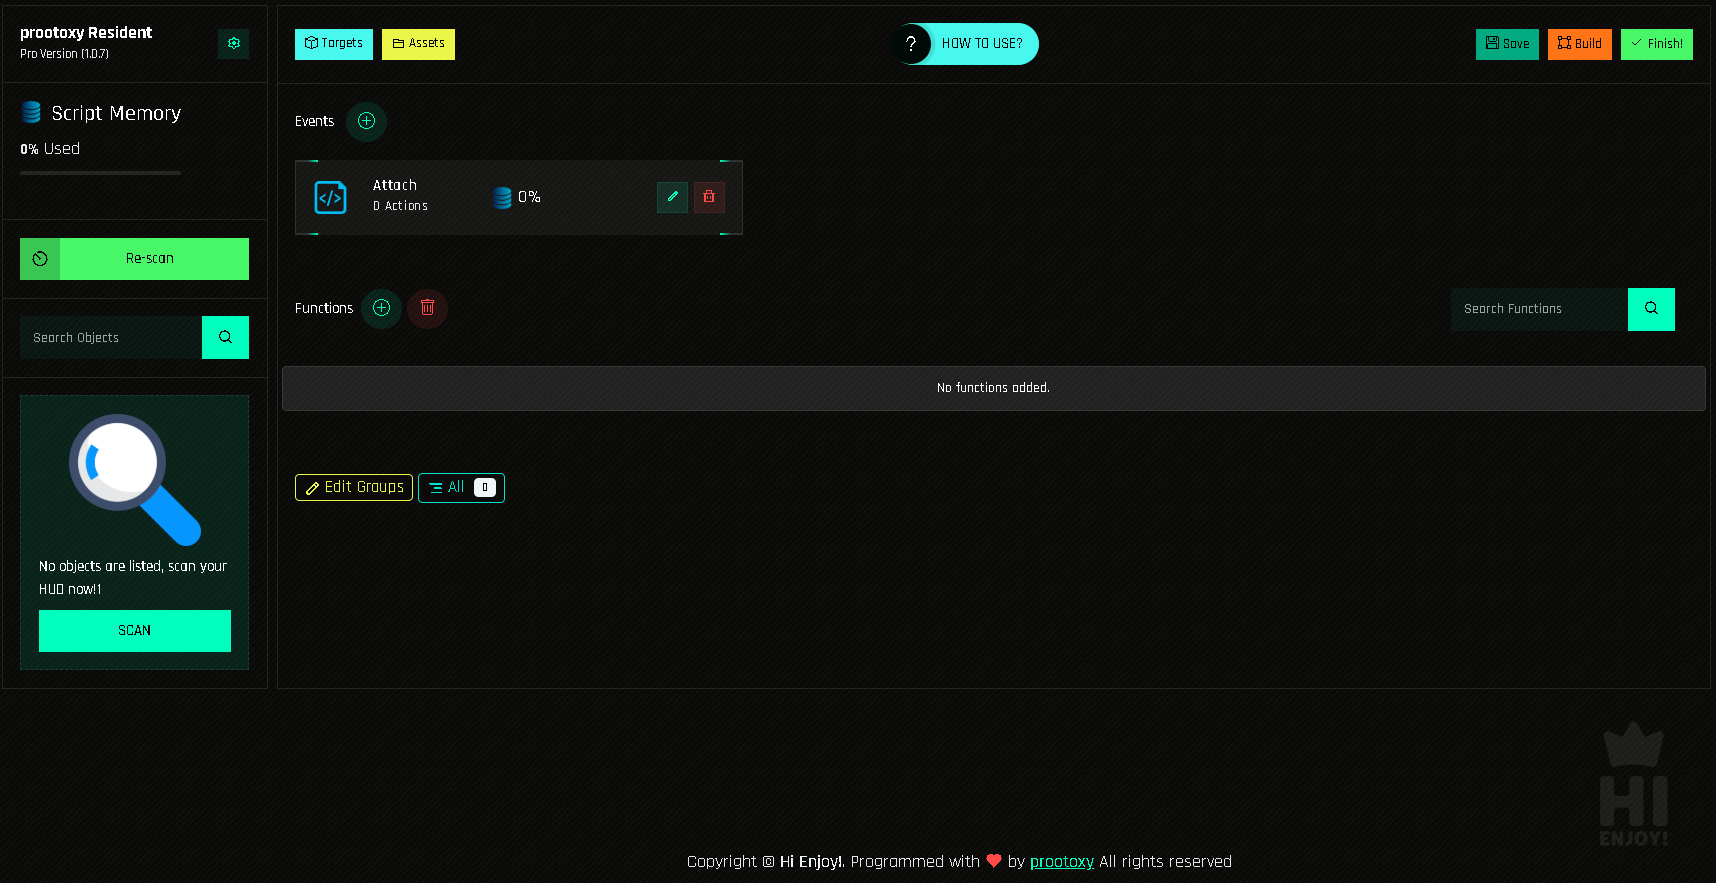
The panel right after opening the link, before the first scan. Click
button_hello. A function with the same name is created in the center of the screen. Every button is a function: click the button, run the function.Add an action. Click the pencil on the function, then pick Message from the action grid. Choose Owner as the message type, type
Hello from my HUD!, and press Save.Press Build (top right). The panel saves and sends the project to the HUD. The HUD says
READY!in chat.Click
button_helloin-world. You getHello from my HUD!in chat. That is your first working button.
Part 3: make it do something visible
Let's change the color of the HUD itself when the button is clicked.
Open
button_helloagain (pencil icon) and add a Color action.In Target, choose
$THIS (button_hello).$THISmeans "the button that was clicked". You could also pick the root prim from the list.Tick All in Faces, enter
<1.000, 0.000, 0.000>(red) in Color, and Save.Build, then click the button in-world. It turns red.
You just used the three concepts that make up every 1Click project: a button runs a function, a function is a list of actions.
The loop you will repeat
Change something in the panel → Ctrl+S → Build → test in-world.
Autosave runs in the background, but Build is what sends changes to Second Life. Get used to pressing it often.
What to learn next
Buttons and Functions How buttons, functions and helper functions relate.
Targets Control clothing and other objects from the HUD.
Assets Drop textures and sounds into the HUD and use them with one click.
Actions List Everything a button can do, with every field explained.
Texture Change HUD The classic clothing HUD, step by step.
The Scripts Which add-on you need for which feature.